Spring Boot 3 and Keycloak
實作 Securing Spring Boot 3.1.0 Applications with Spring Security and Keycloak 21
參考資料:https://hennge.com/tw/blog/what-is-openid-connect.html
環境準備: 1. Spring Boot / Spring Security 3.1.2 2. JDK 17 3. Spring Boot Docker Compose 4. Docker (進而安裝 keycloak 22、MySQL)
pom.xml
<?xml version="1.0" encoding="UTF-8"?>
<project xmlns="http://maven.apache.org/POM/4.0.0"
    xmlns:xsi="http://www.w3.org/2001/XMLSchema-instance"
    xsi:schemaLocation="http://maven.apache.org/POM/4.0.0 https://maven.apache.org/xsd/maven-4.0.0.xsd">
    <modelVersion>4.0.0</modelVersion>
    <parent>
        <groupId>org.springframework.boot</groupId>
        <artifactId>spring-boot-starter-parent</artifactId>
        <version>3.1.2</version>
        <relativePath /> <!-- lookup parent from repository -->
    </parent>
    <groupId>com.example</groupId>
    <artifactId>HelloSpringBoo2</artifactId>
    <version>0.0.1-SNAPSHOT</version>
    <name>HelloSpringBoo2</name>
    <description>Demo project for Spring Boot</description>
    <properties>
        <java.version>17</java.version>
    </properties>
    <dependencies>
        <dependency>
            <groupId>org.springframework.boot</groupId>
            <artifactId>spring-boot-starter-oauth2-resource-server</artifactId>
        </dependency>
        <dependency>
            <groupId>org.springframework.security</groupId>
            <artifactId>spring-security-oauth2-jose</artifactId>
        </dependency>
        <dependency>
            <groupId>org.springframework.boot</groupId>
            <artifactId>spring-boot-starter-security</artifactId>
        </dependency>
        <dependency>
            <groupId>org.springframework.boot</groupId>
            <artifactId>spring-boot-starter-web</artifactId>
        </dependency>

        <dependency>
            <groupId>org.springframework.boot</groupId>
            <artifactId>spring-boot-devtools</artifactId>
            <scope>runtime</scope>
            <optional>true</optional>
        </dependency>
        <dependency>
            <groupId>org.springframework.boot</groupId>
            <artifactId>spring-boot-docker-compose</artifactId>
            <scope>runtime</scope>
            <optional>true</optional>
        </dependency>
        <dependency>
            <groupId>org.projectlombok</groupId>
            <artifactId>lombok</artifactId>
            <optional>true</optional>
        </dependency>
        <dependency>
            <groupId>org.springframework.boot</groupId>
            <artifactId>spring-boot-starter-test</artifactId>
            <scope>test</scope>
        </dependency>
        <dependency>
            <groupId>org.springframework.security</groupId>
            <artifactId>spring-security-test</artifactId>
            <scope>test</scope>
        </dependency>
    </dependencies>

    <build>
        <plugins>
            <plugin>
                <groupId>org.springframework.boot</groupId>
                <artifactId>spring-boot-maven-plugin</artifactId>
                <configuration>
                    <excludes>
                        <exclude>
                            <groupId>org.projectlombok</groupId>
                            <artifactId>lombok</artifactId>
                        </exclude>
                    </excludes>
                </configuration>
            </plugin>
        </plugins>
    </build>

</project>
compose.yaml
volumes:
  mysql_data:
      driver: local

services:
  mysql:
      image: mysql
      volumes:
        - mysql_data:/var/lib/mysql
      environment:
        MYSQL_ROOT_PASSWORD: root
        MYSQL_DATABASE: keycloak
        MYSQL_USER: keycloak
        MYSQL_PASSWORD: password
      ports:
        - 3306:3306
  keycloak:
    image: quay.io/keycloak/keycloak:22.0.1
    container_name: keycloak
    environment:
      - KEYCLOAK_ADMIN=admin
      - KEYCLOAK_ADMIN_PASSWORD=password
      - KC_DB=mysql
      - KC_DB_URL_HOST=mysql
      - KC_DB_URL_DATABASE=keycloak
      - KC_DB_USERNAME=keycloak
      - KC_DB_PASSWORD=password
      - KC_HEALTH_ENABLED=true
    ports:
      - "9090:8080"
    command: start-dev
    depends_on:
      - mysql
#    healthcheck:
#      test: "curl -f http://localhost:9090/health/ready || exit 1"
  adminer:
    image: adminer
    restart: always
    ports:
      - 8081:8080
Spring Security Config
@Configuration
@EnableWebSecurity
@EnableMethodSecurity
public class WebSecurityConfig {

    @Bean
    public SecurityFilterChain securityFilterChain(HttpSecurity httpSecurity) throws Exception {
        httpSecurity.authorizeHttpRequests(registry -> registry
                // .requestMatchers("/secured/**").hasRole("SYS_ADMIN")
                // .requestMatchers("/secured/**").permitAll()
                .anyRequest().authenticated())
                .oauth2ResourceServer(oauth2Configurer -> oauth2Configurer
                        .jwt(jwtConfigurer -> jwtConfigurer.jwtAuthenticationConverter(jwt -> {
                            Map<String, Collection<String>> realmAccess = jwt.getClaim("realm_access");
                            Collection<String> roles = realmAccess.get("roles");
                            var grantedAuthorities = roles.stream()
                                    .map(role -> new SimpleGrantedAuthority("ROLE_" + role)).toList();
                            return new JwtAuthenticationToken(jwt, grantedAuthorities);
                        })));

        return httpSecurity.build();
    }
}
Controller
可以在 Controller 層中加入 @PreAuthorize,代表需要擁有 SYS_ADMIN 角色的用戶,才能夠存取這一個Controller 的資源。
@PreAuthorize 也可以放到 Controller 層中的每一個 Method 中。以做更細顆粒度的授權。
@RequestMapping("/secured")
@RestController
@PreAuthorize("hasRole('SYS_ADMIN')")
public class MySuperSecuredController {

    @GetMapping("/get-data")
    public String get(){
        return "SUPER SECURED DATA";
    }

}
application.yaml
server:
  port: 8080

spring:
  security:
    oauth2:
      resourceserver:
        jwt:
          issuer-uri: http://localhost:9090/realms/MyAppRealm
          jwk-set-uri: http://localhost:9090/realms/MyAppRealm/protocol/openid-connect/certs
MyAppRealm:需要在Keycloak中新增此Realm。相關設定如下。
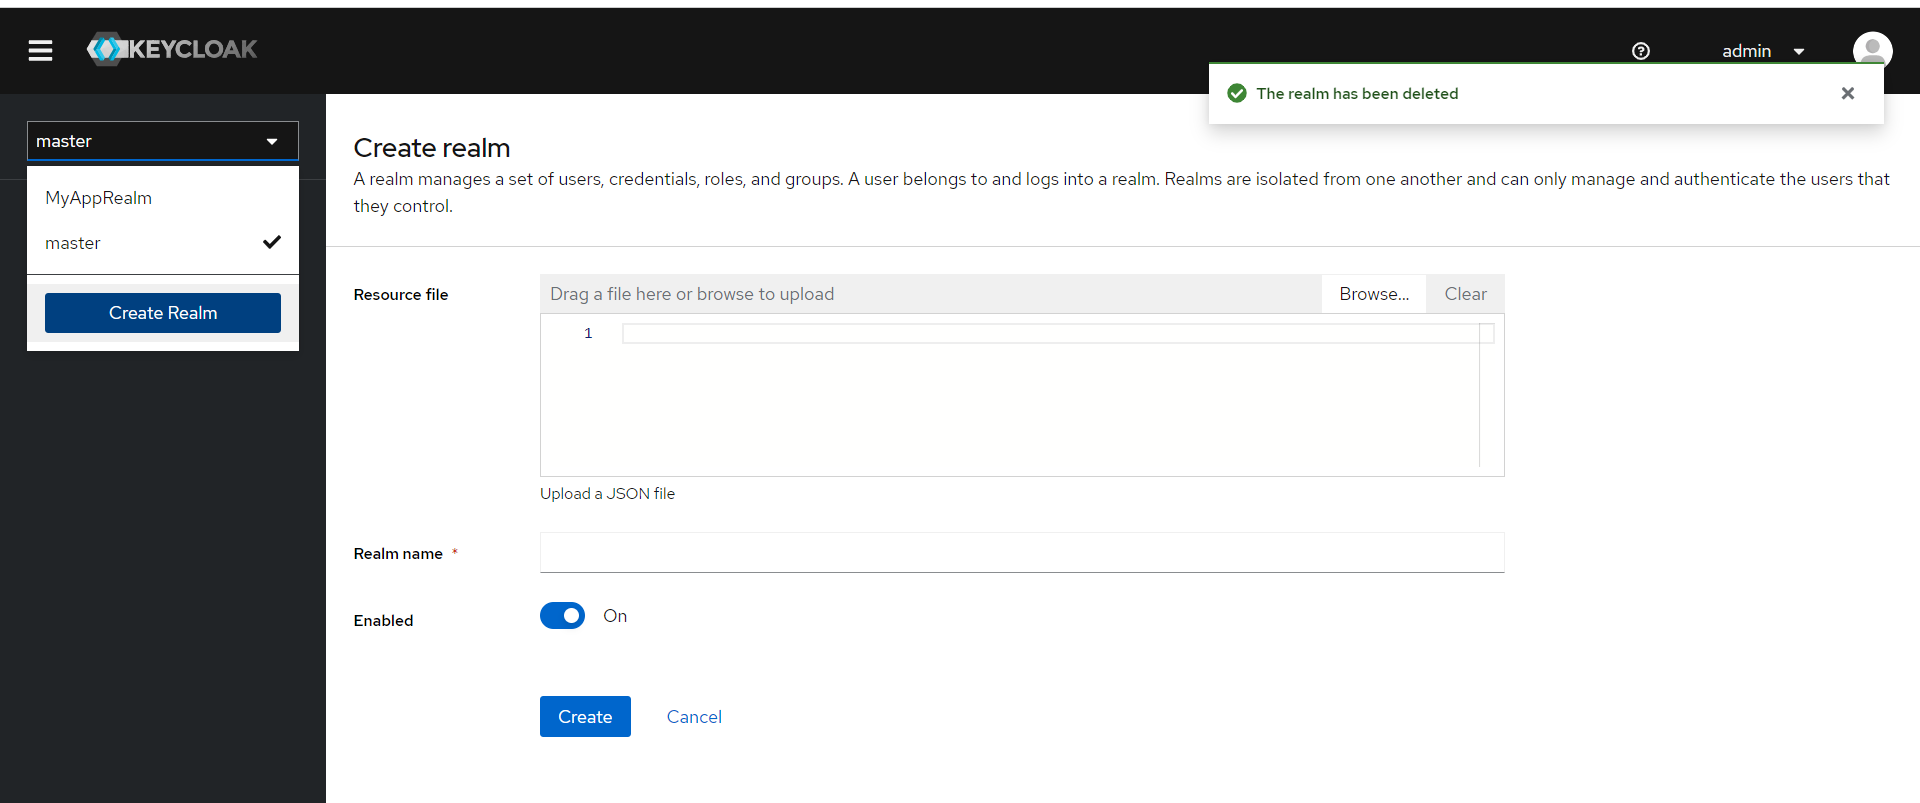
Keycloak 在 Docker 與 設定 Keycloak

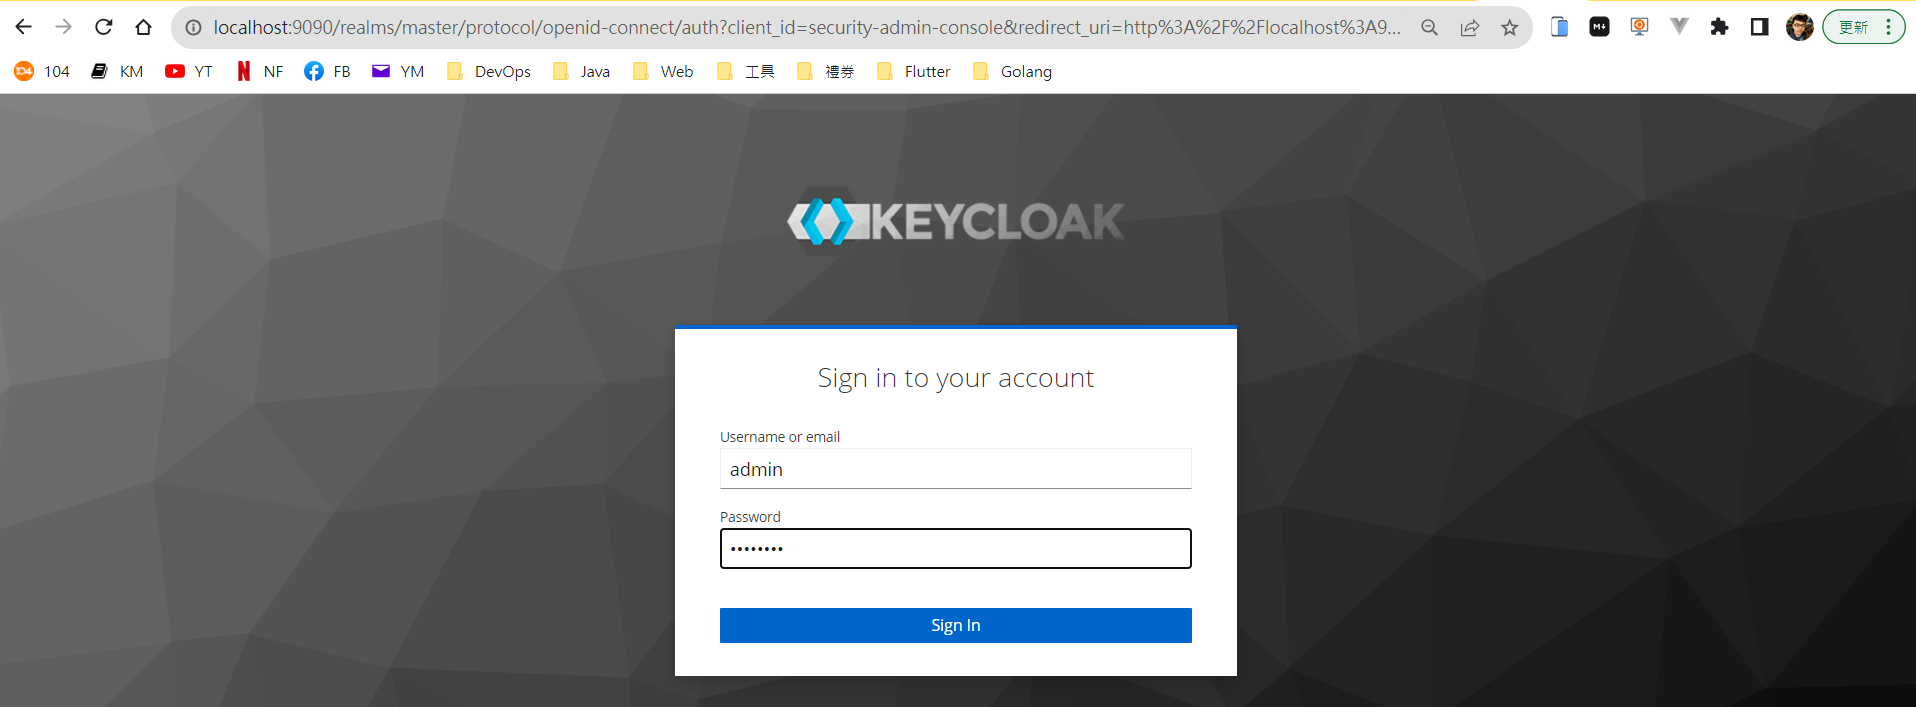
打開瀏覽器,開啟 Keycloak 登入頁面 (http://localhost:9090)
Realm
輸入 Realm name:MyAppRealm
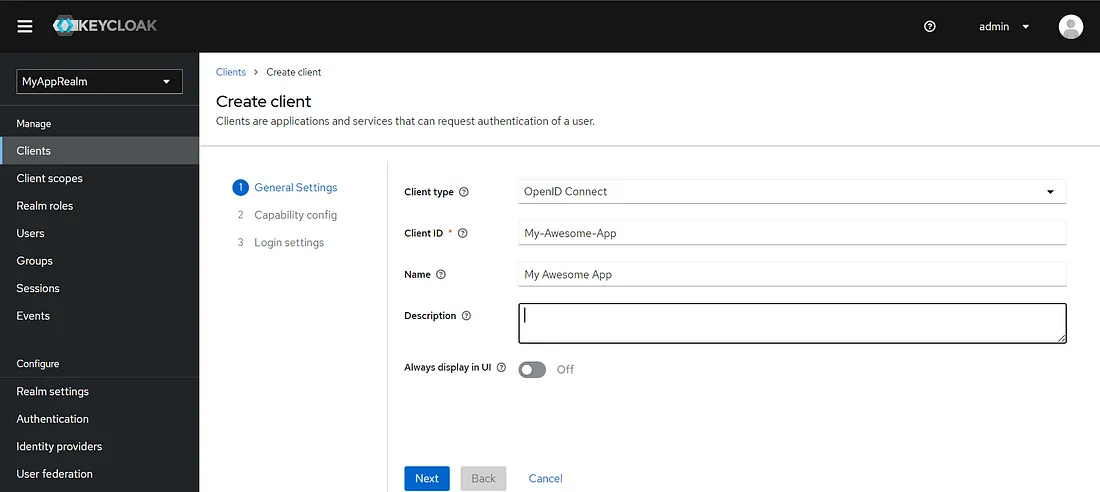
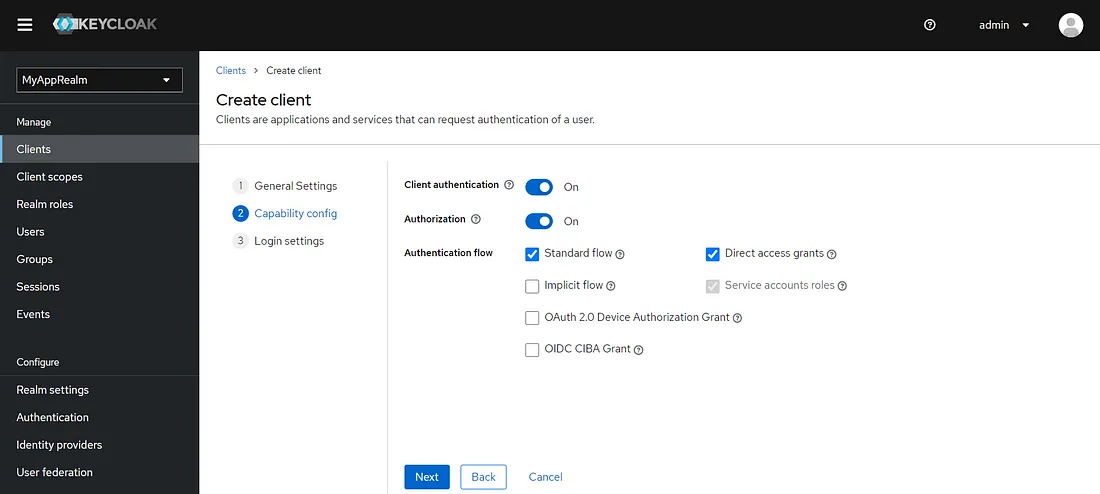
Client
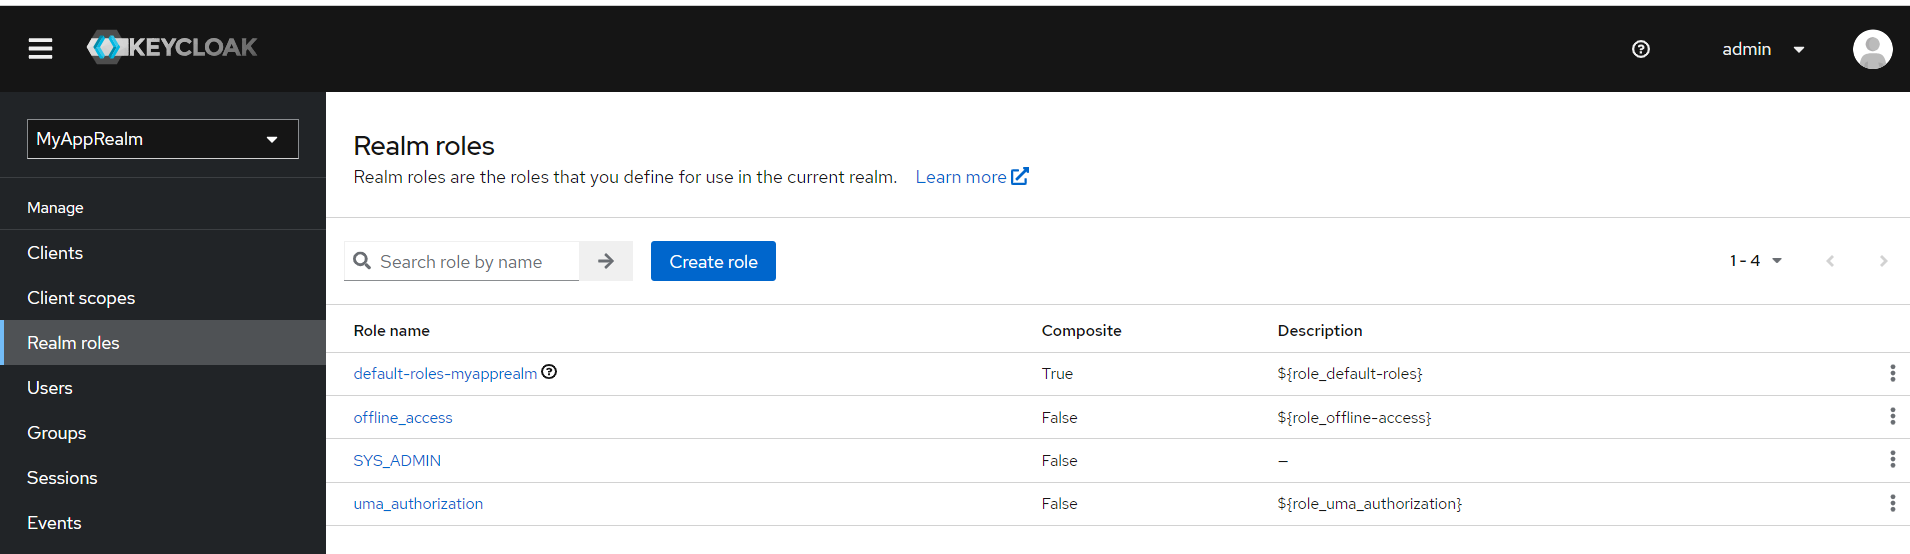
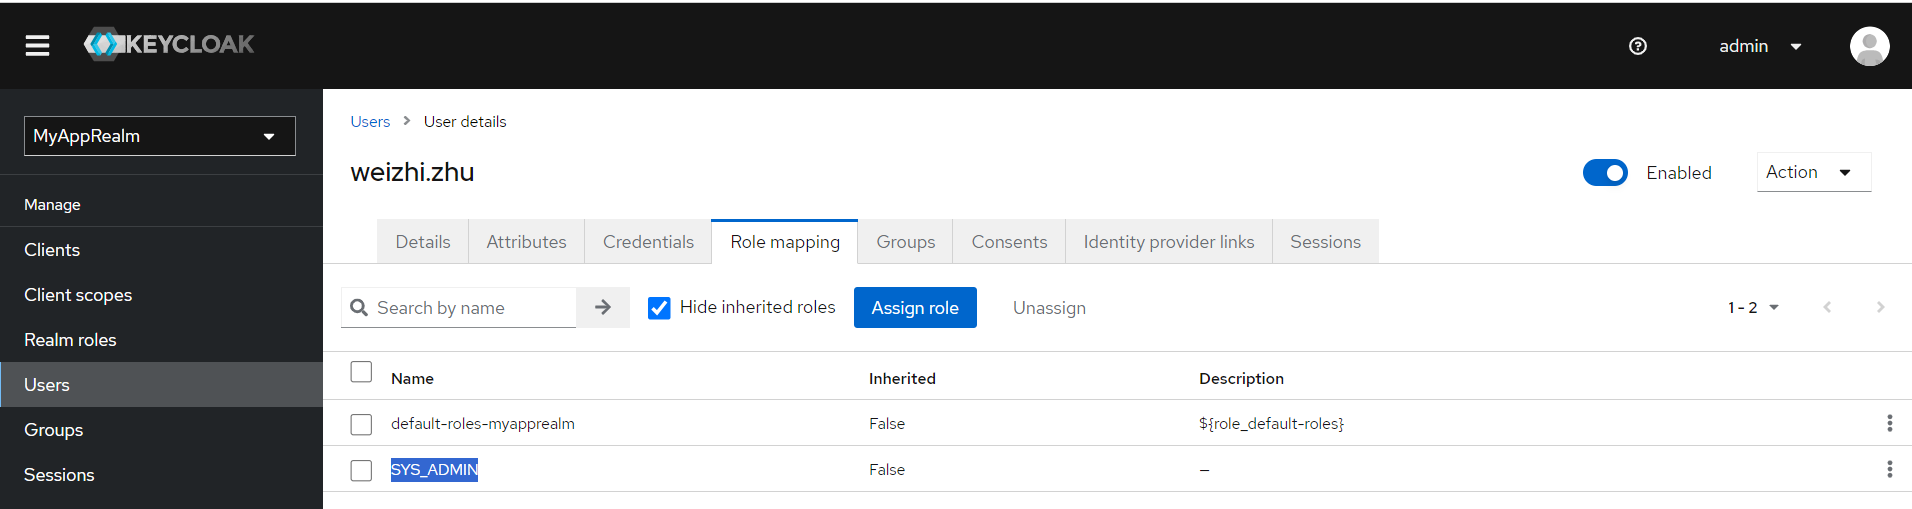
Role:SYS_ADMIN
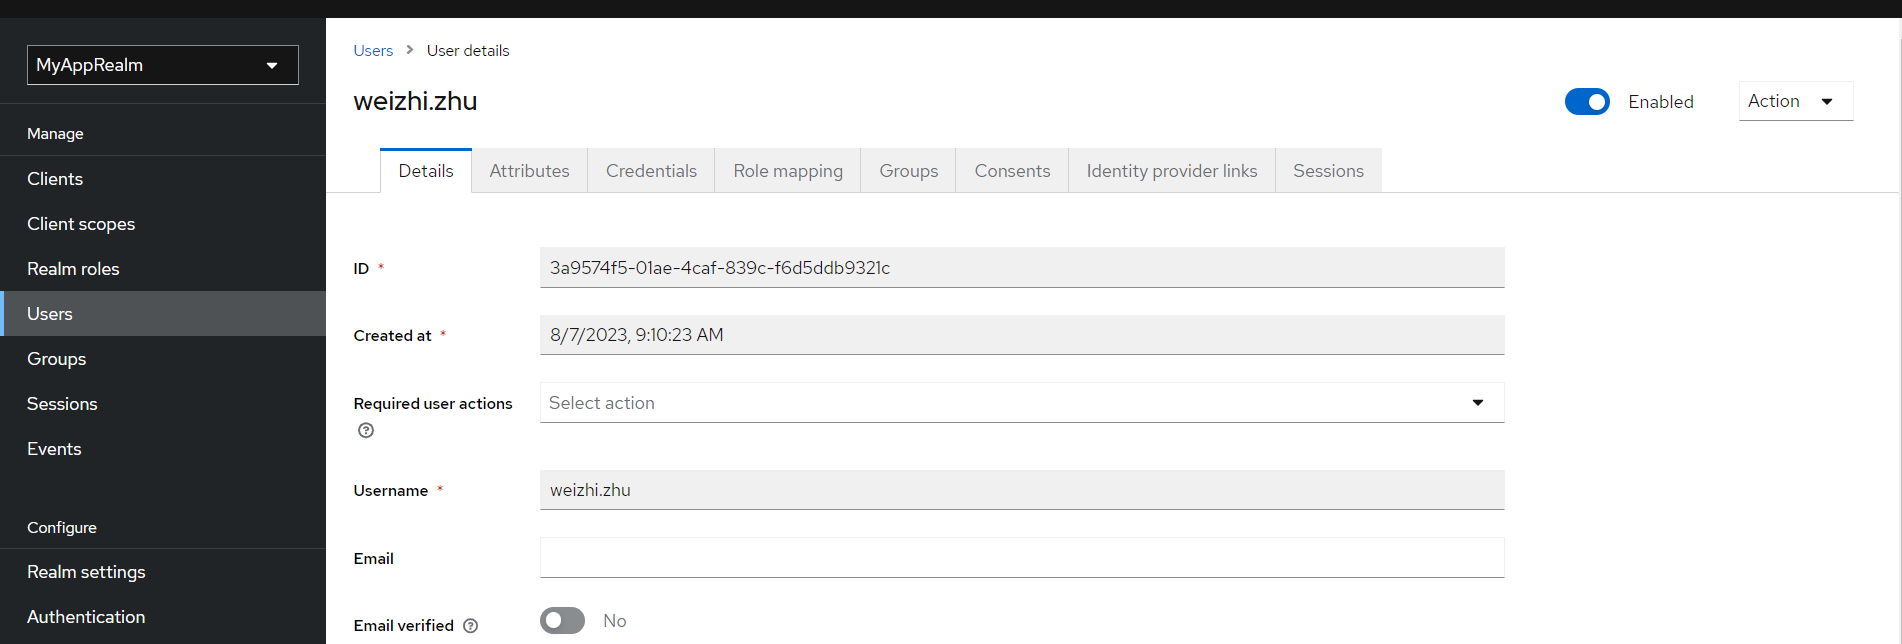
User:建立一個 User,並且將角色綁定進去。
Postman 測試
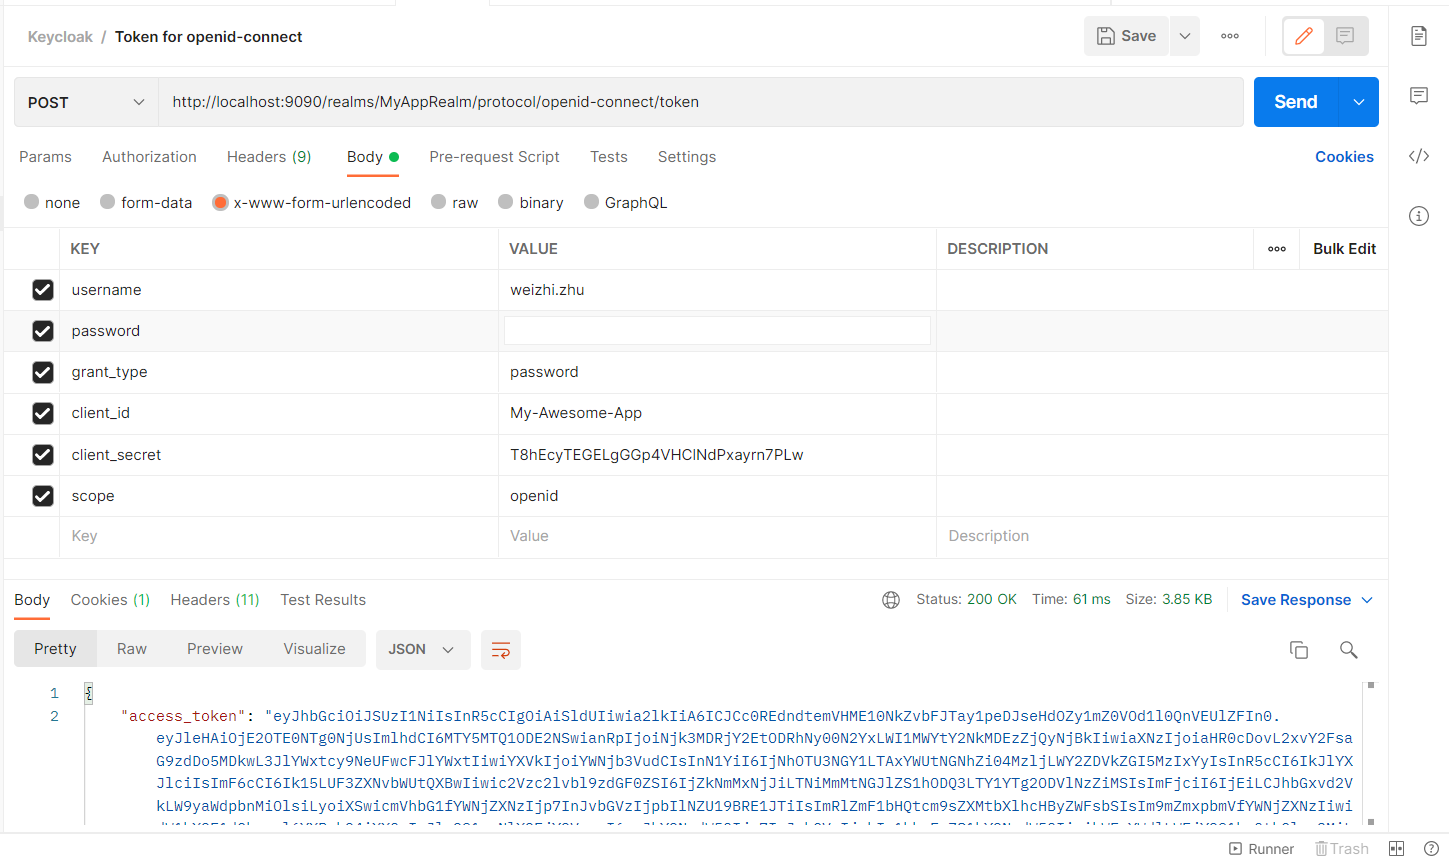
透過 OpenID Connect 取得 Token
http://localhost:9090/realms/MyAppRealm/protocol/openid-connect/token
利用剛剛取得的Token,存取 Web API 資訊
http://localhost:8080/secured/get-data

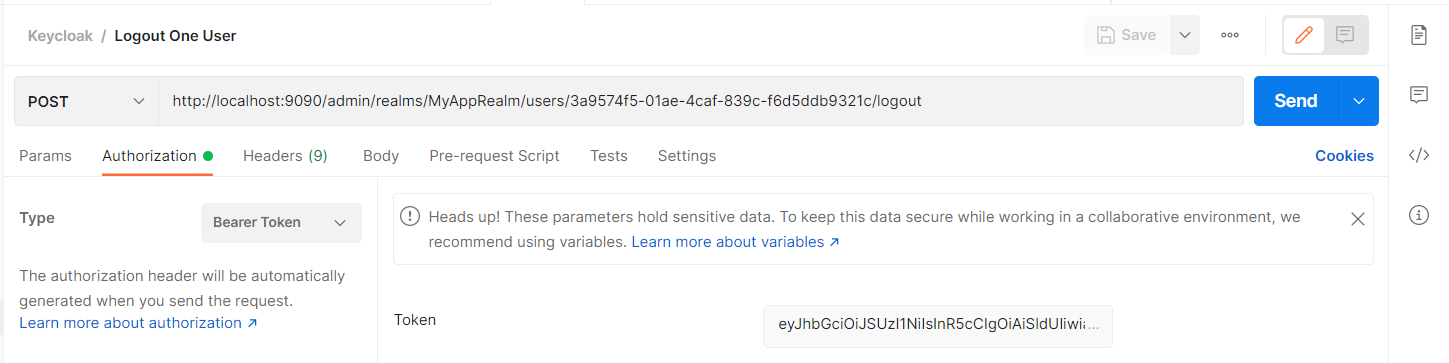
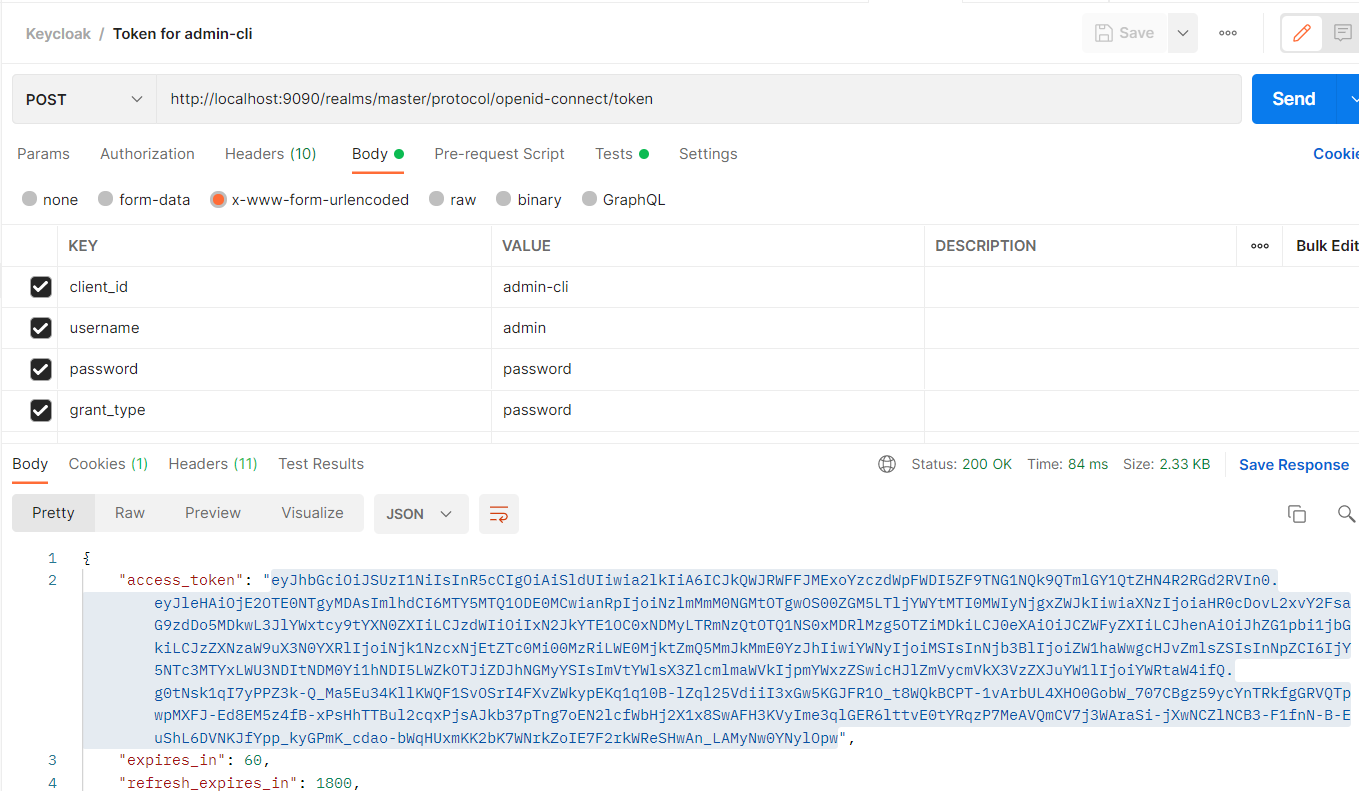
如果要登出某一用戶的所有 Session
http://localhost:9090/realms/master/protocol/openid-connect/token
http://localhost:9090/admin/realms/MyAppRealm/users/3a9574f5-01ae-4caf-839c-f6d5ddb9321c/logout