NFS
Use NFS for Persistent Volumes
- https://microk8s.io/docs/nfs
1. Setup an NFS server
假設在 192.168.0.16 架設 NFS server
sudo apt update
sudo apt-get install nfs-kernel-server
Create a directory to be used for NFS:
sudo mkdir -p /srv/nfs
sudo chown nobody:nogroup /srv/nfs
sudo chmod 0777 /srv/nfs
Edit the /etc/exports file. Make sure that the IP addresses of all your MicroK8s nodes are able to mount this share. For example, to allow all IP addresses in the 10.0.0.0/24 subnet
sudo mv /etc/exports /etc/exports.bak
echo '/srv/nfs 192.168.0.0/24(rw,sync,no_subtree_check,no_root_squash)' | sudo tee /etc/exports
重啟
sudo systemctl restart nfs-kernel-server.service
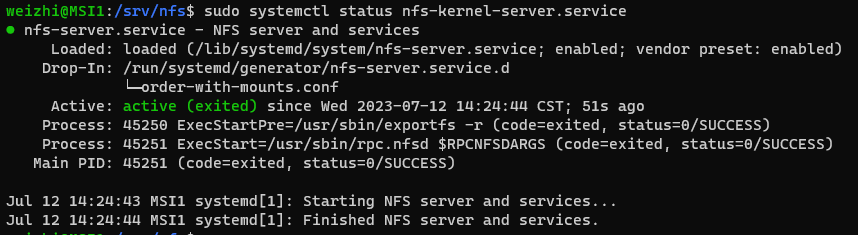
確認 NFS Server是否正常啟動
sudo systemctl status nfs-kernel-server.service
或是可以使用 showmount 命令來檢查 NFS Server 開出來的目錄
showmount -e 192.168.0.16

1-1. NFS Client (可選,作為測試用)
使用 apt 命令進行安裝 NFS Client
sudo apt update
sudo apt install nfs-common
使用 showmount 命令檢查 NFS Server 可連線的目錄
showmount -e 192.168.0.16
---output---
Export list for 192.168.0.16:
/srv/nfs 192.168.0.0/24
如果出現堵塞現象(Stuck),可能原因為 NFS Server 的防火牆導致,只要關掉防火牆即可(sudo ufw disable)。
建立掛載用目錄,並將 NFS Server 的目錄掛載至本機目錄
sudo mkdir /srv/nfs
sudo mount 192.168.0.16:/srv/nfs /srv/nfs
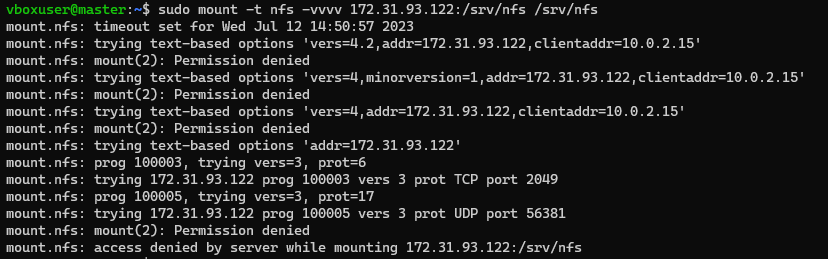
如果出現 mount.nfs: access denied by server while mounting 192.168.0.16:/srv/nfs 問題,可以先透過
sudo mount -t nfs -vvvv 192.168.0.16:/srv/nfs /srv/nfs
查看詳細資訊。
測試:
登入 ssh vboxuser@192.168.17 # NFS Client 登入 ssh vboxuser@192.168.16 # NFS Server 因為 NFS Client 將本機的 /srv/nfs 資料夾,綁定在 NFS Server 的 /srv/nfs 資料夾 資料夾中,所以兩者資料夾會同步。
先在 NFS Client 執行以下命令
touch /srv/nfs/123.txt
ls
再去 NFS Server 執行以下命令,就會看到 123.txt 檔案了
cd /srv/nfs
ls

2.Install the CSI driver for NFS
3.Create a StorageClass for NFS & Create a new PVC
# sc-nfs.yaml
---
apiVersion: storage.k8s.io/v1
kind: StorageClass
metadata:
  name: nfs-csi
provisioner: nfs.csi.k8s.io
parameters:
  server: 192.168.0.16
  share: /srv/nfs
reclaimPolicy: Delete
volumeBindingMode: Immediate
mountOptions:
  - hard
  - nfsvers=4.1

microk8s kubectl apply -f - < sc-nfs.yaml
# pvc-nfs.yaml
---
apiVersion: v1
kind: PersistentVolumeClaim
metadata:
  name: my-pvc
spec:
  storageClassName: nfs-csi
  accessModes: [ReadWriteOnce]
  resources:
    requests:
      storage: 5Gi

microk8s kubectl apply -f - < pvc-nfs.yaml
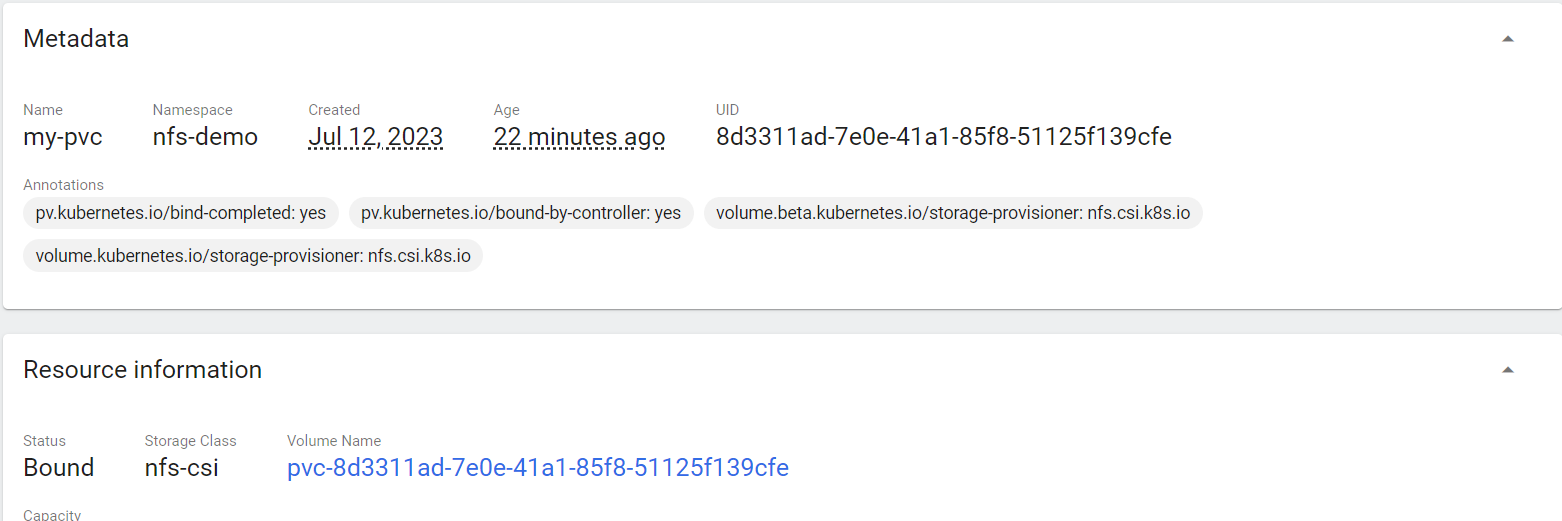
microk8s kubectl describe pvc my-pvc
4. 測試 Pod
apiVersion: v1
kind: Pod
metadata:
  name: hwchiu
  labels:
    app: hwchiu
spec:
  containers:
  - name: busybox
    image: hwchiu/netutils:latest
    volumeMounts:
      - name: nfs-volume
        mountPath: /nfs
  volumes:
    - name: nfs-volume
      persistentVolumeClaim:
        claimName: my-pvc
進入Pod
kubectl exec -it hwchiu -n nfs-demo -- /bin/bash
ls  # 看看有沒有剛剛建立的 456.txt

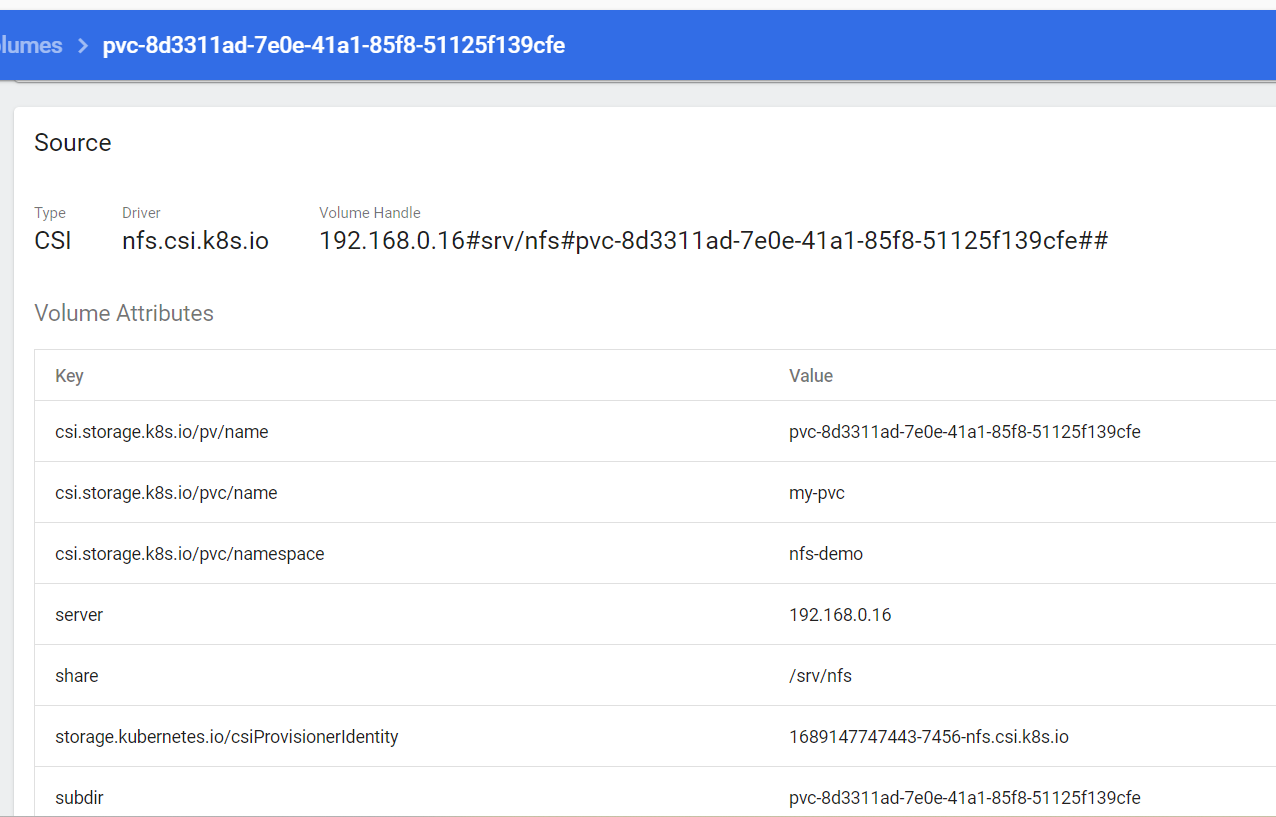
以下是這個 Pod 的 Volume 完整資訊
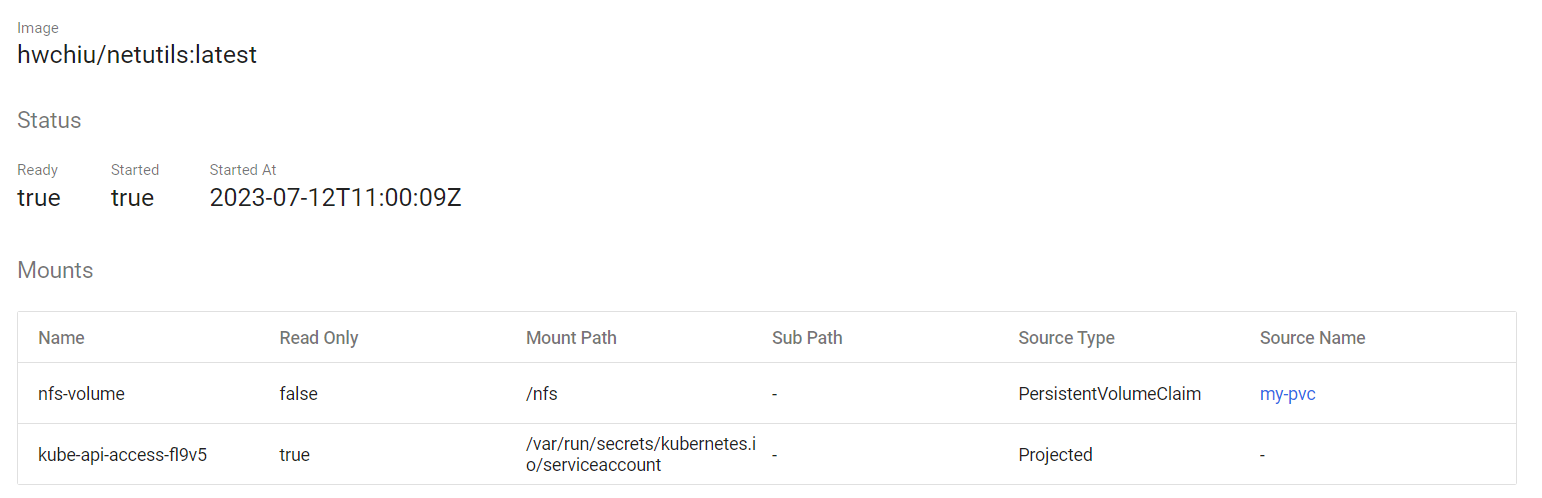
pvc 資訊
pv 資訊
5. MySQL + NFS
kubectl create namespace kube-demo
kubectl create secret generic mysql-pass --from-literal=password=password321 -n kube-demo
PV、PVC
apiVersion: v1
kind: PersistentVolume
metadata:
  name: mysql-pv
  labels:
    pv: mysql-pv
spec:
  storageClassName: nfs-csi
  capacity:
    storage: 15Gi
  accessModes:
    - ReadWriteMany
  persistentVolumeReclaimPolicy: Recycle
  nfs:
    path: /srv/nfs/mysql-pv
    server: 192.168.0.16
---
apiVersion: v1
kind: PersistentVolumeClaim
metadata:
  name: mysql-pvc
spec:
  storageClassName: "nfs-csi"
  accessModes:
    - ReadWriteMany
  resources:
    requests:
      storage: 10Gi
  selector:
    matchLabels:
      pv: mysql-pv


Deployment
apiVersion: v1
kind: Service
metadata:
  name: mysql
spec:
  selector:
    app: mysql
  ports:
    - protocol: TCP
      port: 3306
      targetPort: 3306
      nodePort: 31306
  type: NodePort
---
apiVersion: apps/v1
kind: Deployment
metadata:
  name: mysql
  labels:
    app: mysql-test
spec:
  replicas: 1
  selector:
    matchLabels:
      app: mysql
  template:
    metadata:
      labels:
        app: mysql
    spec:
      nodeName: node
      containers:
      - name: mysql-test
        image: mysql:5.7
        env:
          - name: MYSQL_ROOT_PASSWORD
            valueFrom:
              secretKeyRef:
               name: mysql-pass
               key: password
        ports:
        - containerPort: 3306
        volumeMounts:
        - mountPath: "/var/lib/mysql"
          name: mysql-data
      volumes:
      - name: mysql-data
        persistentVolumeClaim:
          claimName: mysql-pvc
P.S:
如果一直 Pending ,甚至出現 CrashLoopBackOff 的訊息,可以執行
kubectl logs mysql-848b44f4c5-kgdzc -n kube-demo
看看哪裡出錯。

可參考 https://blog.csdn.net/m0_46090675/article/details/122276216 解決此問題。
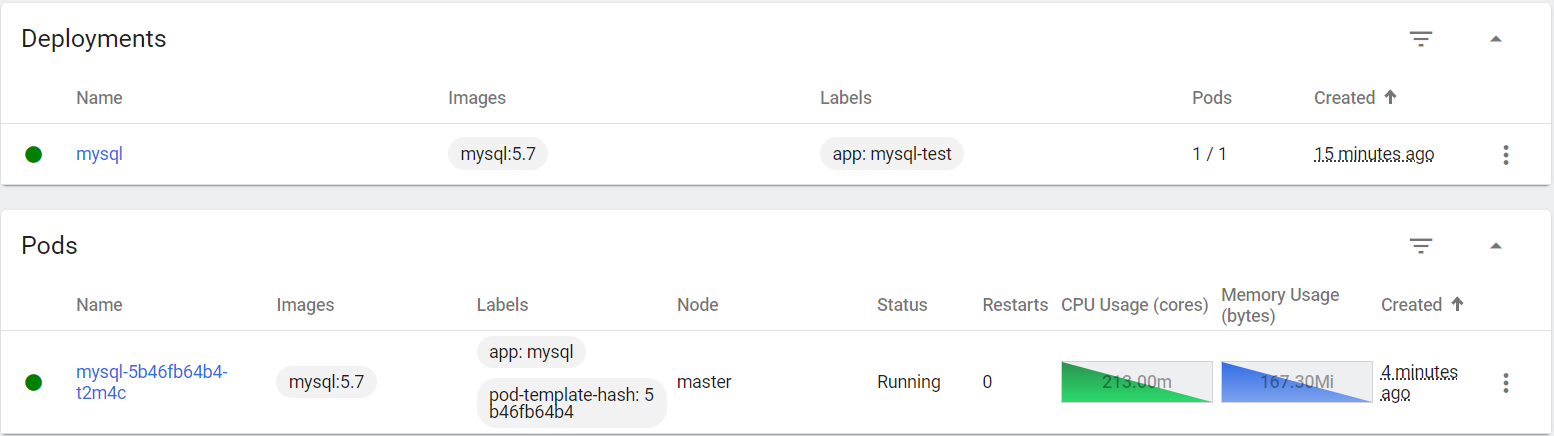
最後就會成功了~~~
首先檢查 NFS Server 的檔案中是否有 mysql 的相關資料

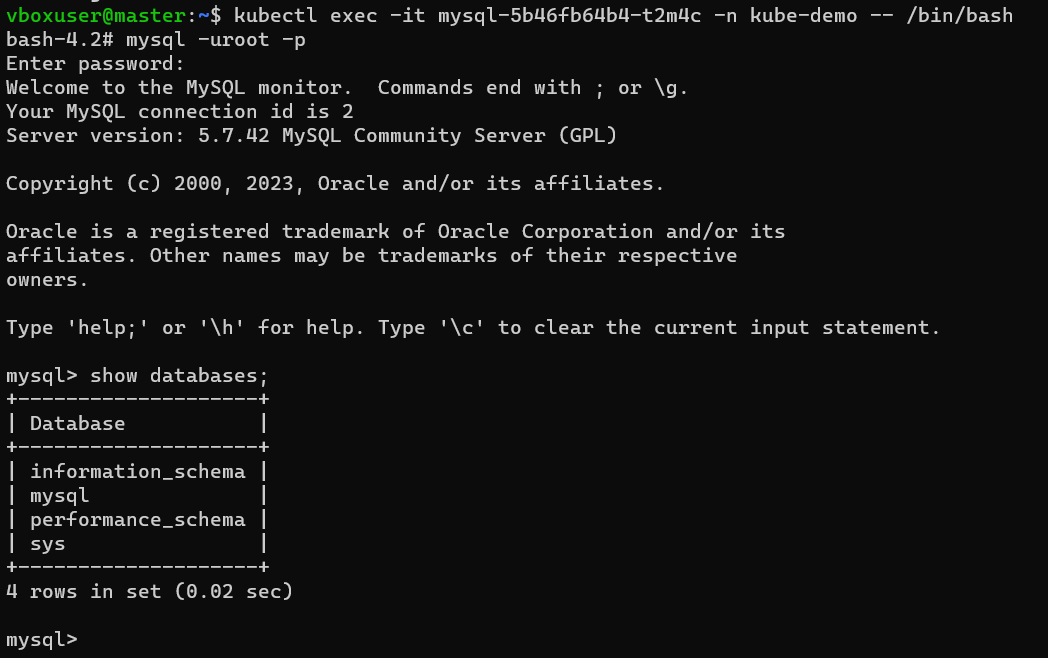
進入 Pod 的命令列中,查看 Mysql 相關資訊
kubectl exec -it mysql-5b46fb64b4-t2m4c -n kube-demo -- /bin/bash